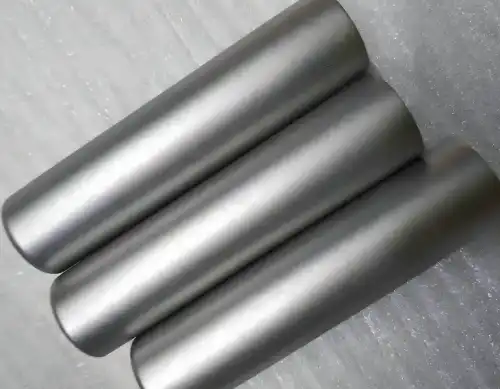
The core role of titanium tube sandblasting
Titanium tube surface sandblasting is a process of impact treatment on the surface of titanium alloy tubes by high-speed jet abrasives, mainly to achieve the following key goals:
Remove surface oxide layer: thoroughly remove the oxide scale formed during the processing and heat treatment of titanium tubes
Improve surface adhesion: create an ideal base surface for subsequent spraying, electroplating, and other processes
Optimize surface roughness: obtain uniform and controllable surface texture (Ra 0.8-6.3μm adjustable)
Eliminate micro defects: improve the surface stress distribution of materials and increase fatigue life

Industry standard sandblasting process parameters
1. Abrasive selection standard
| Abrasive type | Particle size | Applicable scenarios | Lifespan |
| White corundum | 80-120 mesh | High-precision medical-grade processing | 8-10 cycles |
| Glass beads | 100-200 mesh | Surface treatment of aviation hydraulic pipes | 5-8 cycles |
| Stainless steel shot | 0.3-0.8mm | Heavy chemical pipelines | 15-20 cycles |
| Note: It is strictly forbidden to use iron-containing abrasives (such as ordinary steel sand) to prevent iron contamination | |||
2. Key process control indicators
Air pressure range: 0.4-0.7MPa (adjusted according to the tube wall thickness)
Spray angle: 45°-75° (optimal surface uniformity angle)
Processing time: 30-120 seconds/meter (depending on the initial surface state)
Surface roughness: Ra 1.6-3.2μm (general industrial standard)
Special requirements for medical and aviation grades
ASTM F86 standard (medical devices):
99.5% high-purity alumina abrasives must be used
Surface residual particles ≤50/cm² (100x microscope detection)
Cross-contamination is prohibited (special sandblasting equipment)
AMS 2488 standard (aerospace):
Abrasive moisture content ≤ 0.1%
Compressed air dew point ≤ -40℃
Surface energy test is required (dyne value ≥ 38mN/m)
Quality inspection methods and standards
Visual inspection:
100% full inspection, the surface should be uniform and matte
No untreated areas, excessive sandblasting, or "orange peel" phenomenon is allowed
Roughness detection:
Use a portable roughness meter, at least 3 test points per 2 meters
The fluctuation range does not exceed ±15% of the standard value
Cleanliness test:
White glove wiping method (no visible contaminants)
Residual abrasive weight ≤ 0.1mg/cm² (weighing method)
Solutions to common problems
▶ Problem 1: Color difference after sandblasting
Cause: Abrasive contamination or unstable air pressure
Countermeasures: Replace the new abrasive and calibrate the pressure control system
▶ Problem 2: Uneven surface roughness
Reason: Nozzle wear or inconsistent travel speed
Countermeasure: Replace the nozzle every 4 hours and use automated sandblasting equipment
▶ Problem 3: Excessive wear on corners
Reason: Improper spray angle
Countermeasure: Use a 30° re-blasting process and use a special corner protection fixture
Advantages of our professional sandblasting service
✔ Military-grade equipment: Equipped with a 6-axis robot sandblasting system with an accuracy of ±0.5mm
✔ Full process control: 19 quality inspection procedures from abrasive screening to final cleaning
✔ Special process reserves:
Inner hole sandblasting (minimum Φ8mm)
Local mask sandblasting (accuracy 0.2mm)
Compound sandblasting-passivation integrated treatment
✔ Certification system:
ISO 9001/13485 quality management system
NADCAP aerospace special process certification
FDA medical device production registration


